Categories
//Configuring FreeRadius for 802.1x
Configuring FreeRadius for 802.1x
Guide to installing an alternative Radius service, for those who may have implemented Windows NPS Server - License Free and Open Source, Enterprise Ready
In a pervious post, I covered the steps to deploy the current stable release of FreeRadius, by installing the packages from the NetworkRadius organizations repository.
We will now, focus on configuring the FreeRadius server so that it can authenticate 802.1x requests.
Why?
Why would we go to this trouble, especially given the fact that Windows has shipped with its own NPS service, for the past 20 years?
Simple really, In the world of Cloud First, many customers are now selecting the option of Azure AD Joined only, for their machines in preference to AD Joined, or even Hybrid Joined. This matters, as the Windows NPS Service is hardcoded to check if a computer account object is present in the Active Directory; which is obviously not the case for Cloud Only systems. The result - every authentication request will automatically respond as failed validation!
Configuring Free Radius
There are a number of files used to configure the behavior of the FreeRadius service, the default configuration within these files is very verbose, so in this post we will clean up the configuration, and implement the settings required to validate 802.1x requests - Specifically we will check the computer certificate to ensure it is valid.
FreeRaidus by default protects all the configuration so that your normal account has no access to the files, and folders. To enable a lower resistance path to working on this server, you can Assume
rootaccess with the following commandsudo su -
Radius Server
We will turn off proxy features in the server, and enable logging for authentication. We begin by editing the core configuration file called /etc/freeradius/radiusd.conf
prefix = /usr
exec_prefix = /usr
sysconfdir = /etc
localstatedir = /var
sbindir = ${exec_prefix}/sbin
logdir = /var/log/freeradius
raddbdir = /etc/freeradius
radacctdir = ${logdir}/radacct
name = freeradius
confdir = ${raddbdir}
modconfdir = ${confdir}/mods-config
certdir = ${confdir}/certs
cadir   = ${confdir}/certs
run_dir = ${localstatedir}/run/${name}
db_dir = ${raddbdir}
libdir = /usr/lib/freeradius
pidfile = ${run_dir}/${name}.pid
correct_escapes = true
max_request_time = 30
cleanup_delay = 5
max_requests = 16384
hostname_lookups = no

log {
  destination = files
  colourise = yes
  file = ${logdir}/radius.log
  syslog_facility = daemon
  stripped_names = no
  auth = no
  auth_badpass = no
  auth_goodpass = no
  msg_denied = "You are already logged in - access denied"
}

checkrad = ${sbindir}/checkrad

ENV {
}

security {
  user = freerad
  group = freerad
  allow_core_dumps = no
  max_attributes = 200
  reject_delay = 1
  status_server = yes
}

proxy_requests  = yes
$INCLUDE proxy.conf
$INCLUDE clients.conf

thread pool {
  start_servers = 5
  max_servers = 32
  min_spare_servers = 3
  max_spare_servers = 10
  max_requests_per_server = 0
  auto_limit_acct = no
}

modules {
  $INCLUDE mods-enabled/
}

instantiate {
}

policy {
  $INCLUDE policy.d/
}

$INCLUDE sites-enabled/
Proxy Configuration
The configuration of the proxy feature is maintained in the file `/etc/freeradius/proxy.conf'
proxy server {
  default_fallback = no
}

home_server localhost {
  type = auth
  ipaddr = 127.0.0.1
  port = 1812
  secret = testing123
  response_window = 20
  zombie_period = 40
  revive_interval = 120
  status_check = status-server
  check_interval = 30
  check_timeout = 4
  num_answers_to_alive = 3
  max_outstanding = 65536

  coa {
    irt = 2
    mrt = 16
    mrc = 5
    mrd = 30
  }

  limit {
    max_connections = 16
    max_requests = 0
    lifetime = 0
    idle_timeout = 0
  }
}

home_server_pool my_auth_failover {
  type = fail-over
  home_server = localhost
}

realm example.com {
  auth_pool = my_auth_failover
}

realm LOCAL {
}
Radius Clients
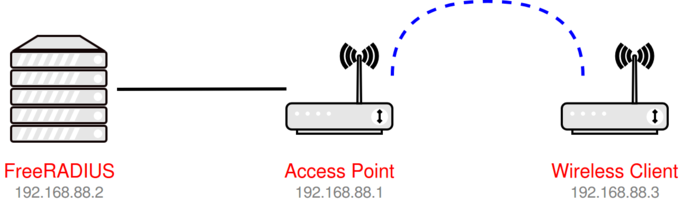
To specify the clients allowed to send requests to the RADIUS server. Most of the times we want to configure a router or wireless access points as a Network Access Server (NAS), so that WiFi clients connecting will communicate to the RADIUS server via the router. We define the client networks in the file /etc/freeradius/clients.conf configuration file
############################ /clients.conf

client localhost {
  ipaddr = 127.0.0.1
  proto = *
  secret = testing123
  require_message_authenticator = no
  nas_type = other
  limit {
    max_connections = 16
    lifetime = 0
    idle_timeout = 30
  }
}

# IPv6 Client
client localhost_ipv6 {
  ipv6addr= ::1
  secret= testing123
}

# Our Clients Network
client private-network-1 {
  ipaddr= 10.46.0.0/16
  secret= radius
  require_message_authenticator = yes
}
The section private-network-1 lists the IP range of the Radius Clients (ipaddr) and the secret they must provide to be trusted (secret).
FreeRadius Default Service
Next we will update the service so that the modules required for WiFi authentication are enabled, and all additional services are disabled.
We will replace the content in /etc/freeradius/sites-enabled/default with the following configuration
############################ sites-enabled/default

server {

  listen {
    type = auth
    port = 1812
    ipaddr = *
  }

  authorize {
    preprocess
    eap {
      ok = return
    }
    expiration
    logintime
  }

  authenticate {
    eap
    Auth-Type eap {
      eap {
        handled = 1
      }

      if (handled && (Response-Packet-Type == Access-Challenge)) {
        attr_filter.access_challenge.post-auth
        handled # override the "updated" code from attr_filter
      }
    }
  }

  preacct {
    preprocess
    acct_unique
    suffix
    files
  }

  accounting {
    detail
    radutmp
    attr_filter.accounting_response
  }

  session {
    radutmp
  }

  post-auth {
    Post-Auth-Type REJECT {
      attr_filter.access_reject
    }

    Post-Auth-Type Challenge {
      remove_reply_message_if_eap
      attr_filter.access_challenge.post-auth
    }
  }

  pre-proxy {
  }

  post-proxy {
    eap
  }
}
FreeRadius EAP Configuration
This is the heart of the configuration, we will disable all the options and focus only on using EAP-TLS for the WiFi authentication.
This configuration will require that we complete the following steps
-
Issue a certificate for this Radius Server, from the same PKI service which we will be issuing certificates to our client devices.
-
The Private Key for this issued Certificate is stored on this server
-
The Root Certificate of the chain we are issuing from (intermediate issuing servers are not required) is also available on this server
-
A working folder, to be used to host the certificates passed from the clients for verification
Create a Certificate for the Radius Server
There are a few steps to this process, Follow this guide Create PKI Certificate for Linux Server to complete the exercise, after which we should have a certificate which matches the requirements called server.pem (1), and a matching private key file called server.key (2) to place in our /etc/freeradius/certs folder.
We need to ensure also the service has read access to this files
chmod 644 /etc/freeradius/certs/server.pem
chmod 644 /etc/freeradius/certs/server.key
PKI Chain for Radius Server
The certificates we have created for the Server and the Clients which will be authenticating to the server are all issued by the same PKI environment. To successfully validate any certificate, we will need a copy of the public keys for each server in this chain, which will be stored in Base64 format in the ca.pem(3) file.
Manually Creating the PEM File
Export all the certificates in the chain, for example Root CA and Issuing CA in turn as Base64.
Copy all the Certificates content into a file called /etc/freeradius/ca.pem, so that it looks similar to the following example - If you issue your certificates directly from your Root CA, then there will be only 1 certificate, or more typically you will have multiple issuers, implying you will have multiple to paste.
-----BEGIN CERTIFICATE-----
MIIGRDCCBCygAwIBAgITaQAAAASav/V29nA9rgAAAAAABDANBgkqhkiG9w0BAQsF
....
.... Root CA Base64 Content
....
gQtDSbTj5kKWLuyPEWT3VepWpJ0MRIceZ/UCpf9KCkR8y9hcMEd+1/vDlFD/AJxz
MvZ0K7TQqxqCJ5OiB3SfH91Bc1D7Yvwn
-----END CERTIFICATE-----
-----BEGIN CERTIFICATE-----
MIIGRDCCBCygAwIBAgITaQAAAASav/V29nA9rgAAAAAABDANBgkqhkiG9w0BAQsF
....
.... Issuing CA Base64 Content
....
MvZ0K7TQqxqCJ5OiB3SfH91Bc1D7Yvwn
-----END CERTIFICATE-----
Creating PEM from a PFX
If we have a PFX file containing the chain of certificates, we can use openssl to create the ca.pem file for us
openssl pkcs12 -in exported.pfx -cacerts -nokeys -chain -out ca.pem
DH Ciphers
For DH cipher suites to work, you have to run OpenSSL to create the DH file first:
openssl dhparam -out certs/dh 2048
EAP Module
We begin by creating a soft link for EAP module under /etc/freeradius/3.0/mods-enabled/
sudo ln -s /etc/freeradius/3.0/mods-available/eap /etc/freeradius/3.0/mods-enabled/
Then change group right of /etc/freeradius/3.0/mods-enabled/eap
sudo chgrp -h freerad /etc/freeradius/3.0/mods-available/eap
sudo chown -R freerad:freerad /etc/freeradius/3.0/mods-enabled/eap
Next configure the logic we need the server to follow. We will edit the file for the module /etc/freeradius/mods-available/eap and set the content as follows
############################ /etc/freeradius/mods-available/eap

eap {
  default_eap_type = tls
  timer_expire = 60
  ignore_unknown_eap_types = no
  cisco_accounting_username_bug = no
  max_sessions = 4096

  tls {
    certdir = ${confdir}/certs
    cadir = ${confdir}/certs
    private_key_password = S3cur3!2021
    private_key_file = ${certdir}/server.key
    certificate_file = ${certdir}/server.pem
    ca_path = ${cadir}
    ca_file = ${cadir}/ca.pem
    dh_file = ${certdir}/dh
    random_file = /dev/urandom
    cipher_list = "HIGH"
    make_cert_command = "${certdir}/bootstrap"
    ecdh_curve = "prime256v1"
    tls_max_version = ""
    tls_min_version = "1.2"

    cache {
      enable = no # Optionally enable
      lifetime = 24 # hours
      max_entries = 255
    }

    verify {
      tmpdir = /var/log/freeradius/radiusd
      client = "/usr/bin/openssl verify -CAfile ${..ca_file} %{TLS-Client-Cert-Filename}"
    }

    ocsp {
      enable = no # optionally enable
      override_cert_url = no
      url = "http://aez-app-prd-scep.azurewebsites.net/ocsp/"
      softfail = yes
      timeout = 10
      use_nonce = no
    }

  }
}
Working folder for Verification
The EAP flow utilizes openssl to validate the clients certificate, in order to complete this, we need to store the certificate to the file system first, and ensure that the service has access to this folder
sudo mkdir /var/log/freeradius/radiusd
sudo chown freerad:freerad /var/log/freeradius/radiusd
Running in Debug mode
Our FreeRadius service is now ready to test, to make this process a lot easier, we can choose to start the service interactively in the console, and watch the debug logs.
systemctl stop freeradius
/usr/sbin.freeradius -x &
This is a great scenario to leverage
tmux, which will allow you have multiple sessions, and keep the session open even after you disconnect, rendering it simple to return to at a later stage
With the service online, we can emulate a client connecting, and providing its client secret e.g. testing123
radtest client@ullensaker.kommune.no testing123 127.0.0.1 0 testing123 -x
When you are satisfied that all is good, we can restart in service mode
systemctl start freeradius
Now - Get a Certificate on your test client, and WiFi gateways configured to communicate with our Radius server; and TEST!
Synchronizing Multiple Servers
For production deployments, you will wish to have multiple instances of the FreeRadius server deployed. As the function of the server is primarily stateless, we really only need to synchronies the actual configuration files, to ensure all our instances are built the same.
The FreeRadius configuration is protected by the root user; therefore to sync files, we need to ensure that the source permissions are respected.
To allow
rsynccomplete this, we need to append to the sudoers file/etc/sudoerssetup your user like this:
username ALL= NOPASSWD:/usr/bin/rsyncThe NOPASSWD:/usr/bin/rsync tells sudo that when your user runs /usr/bin/rsync or just rsync that no password is needed.
We can try the following to sync the files from our source server using SSH based authentication.
rsync -avz -e ssh username@x.x.x.x:/etc/freeradius /etc/freeradius --rsync-path="sudo rsync"

01. About Author
Damian Flynn
I define myself as an evangelist; an entrepreneur & author with an ideology rooted in business insights, technology exploration, pattern analysis and high energy. I envision, theorize and develop system architecture and strategic business platforms, soaked in storytelling and innovative technology.


Mentions